|
|
Open main menu |
||
|
|
Rotate highlighted group of sprites |
||
|
or
|
|||
|
|
Rotate highlighted group of sprites (finer step) |
||
|
or
|
|||
|
|
Rotate highlighted group of sprites (finest step) |
||
|
or
|
|||
|
|
Kinetic sprite / wall movement |
||
|
|
Toggle preview mode on and off |
||
|
|
Search for object number |
||
|
|
Toggle beeps on and off |
||
|
|
Toggle underwater sector status |
||
|
|
Set selected visibility for all sectors |
||
|
|
(while pointing at wall or sector) Toggle textures alignment of all walls of that sector |
||
|
|
Change grid size |
||
|
|
Toggle grid lock on and off |
||
|
|
Masking walls |
||
|
|
Auto-slope |
||
|
|
Sprite orientation |
||
|
|
One side flag |
||
|
|
Cycle through palookups |
||
|
|
Disable auto-slopes for all highlighted walls |
||
|
|
Toggle blocking walls to block move on and off |
||
|
|
(aim in parallax sector) Cycle tiles from 1 to 32 in the parallax sky |
||
|
|
Toggle showing of all invisible sprites |
||
|
|
Change sprite slope |
||
|
or
|
|||
|
Note: To make sprite sloped, it must be floor oriented first.
|
|||
|
|
Go to 2D mode to edit object properties |
||
|
or
|
|||
|
|
Go to Sector Lighting Settings directly |
||
|
|
Game objects menu |
||
|
|
(point at any floor) Enable global floor shade for all paralaxed ceilings |
||
|
To disable global floor shade, just point at any unhighlighted ceiling.
|
|||
|
|
Reset panning, offset and repeats |
||
|
|
Change repeats and panning in X and Y directions at once |
||
|
or
|
|||
|
|
Change repeats and panning in X and Y directions at once, with finer step |
||
|
or
|
|||
Advertisement
|
Drawing path: It is useful if you'd like to use Path Sectors or dude patrolling in your maps.
|
|||
|
First create Path Marker sprite using Game Object menu or sprite edit dialog and press
|
|||
|
The previous path marker will be automatically connected with the new one. Repeatedly press
|
|||
|
|
Change radius of Ambient Sound by 20 |
||
|
or
|
|||
|
|
Change radius of Ambient Sound by 20 - Just change first radius |
||
|
or
|
|||
|
|
Change radius of Ambient Sound by 20 - Just change second radius |
||
|
or
|
|||
|
|
Toggle auto-grid. It changes grid size while zooming |
||
|
|
Enable dense grid |
||
|
|
Listen defined sounds |
||
|
In case of sprites that have multiple sounds set, just press
|
|||
|
|
Game objects menu |
||
|
|
Highlight sectors |
||
|
|
Highlight walls |
||
|
|
Disable auto-slope for all highlighted sectors |
||
|
|
(on sector) Get directly to FX editing dialog |
||
Edit dialog |
|||
|
|
(while on "Message") Visually pick the message from selected episode file |
||
|
|
(while on a "Data" field) Gib type selection helper |
||
|
|
(in dialog area) Show common x-properties |
||
|
If it shows common when you need x-properties, you can press
|
|||
|
|
(for number edit) Reset value to zero |
||
|
|
(hold) Show XObject usage statistics in the status bar |
||
|
|
Enable preview mode |
||
|
|
Disable preview mode |
||
|
|
(in preview mode) Disable preview mode |
||
|
|
Change difficulty |
||
3D mode only |
|||
|
Send CMD 2: State to object / kill enemy / pickup item / destroy the thing |
|||
|
Send CMD 0: Off to object |
|||
|
Send CMD 1: On to object |
|||
|
|
Change Z-Mode (Caps Lock duplicate) |
||
|
|
Spawn an SEQ animation ID on the object you currently pointing. The seq file must be in the resource archive |
||
2D mode only |
|||
|
Send CMD 2: State to object / kill enemy / pickup item / destroy the thing |
|||
|
|
Send CMD 0: Off to object |
||
|
|
Send CMD 1: On to object |
||
|
|
Create an standard explosion. Can be useful for testing gib object's FX effects |
||
|
Tile viewer
|
|||
|
Select a tile |
|||
|
Open detail tile info window |
|||
|
Move mouse to the first row and hold right mouse button to scroll the tiles up |
|||
|
Move mouse to the last row and hold right mouse button to scroll the tiles down |
|||
|
Sprites
|
|||
|
Hold to drag the sprite(s) you currently pointing at by XYZ axis. If sprite was placed on a wall, you may also hold right mouse button to align it according to that wall angle. It doesn't work for group of sprites though |
|||
| + |
Drag sprites only in Z axis |
||
|
Press repeatedly when aiming in floors or ceilings to just rotate sprite in counter-clockwise order. Grid size and grid lock affects x/y dragging |
|||
|
Walls and sectors
|
|||
|
Hold to raise the sector |
|||
|
Hold to lower the sector |
|||
|
Hold
|
|||
|
Highlighting objects
|
|||
|
In 2D mode, highlight or unhighlight wall point or sprite |
|||
|
|
Sectors highlighting process |
||
|
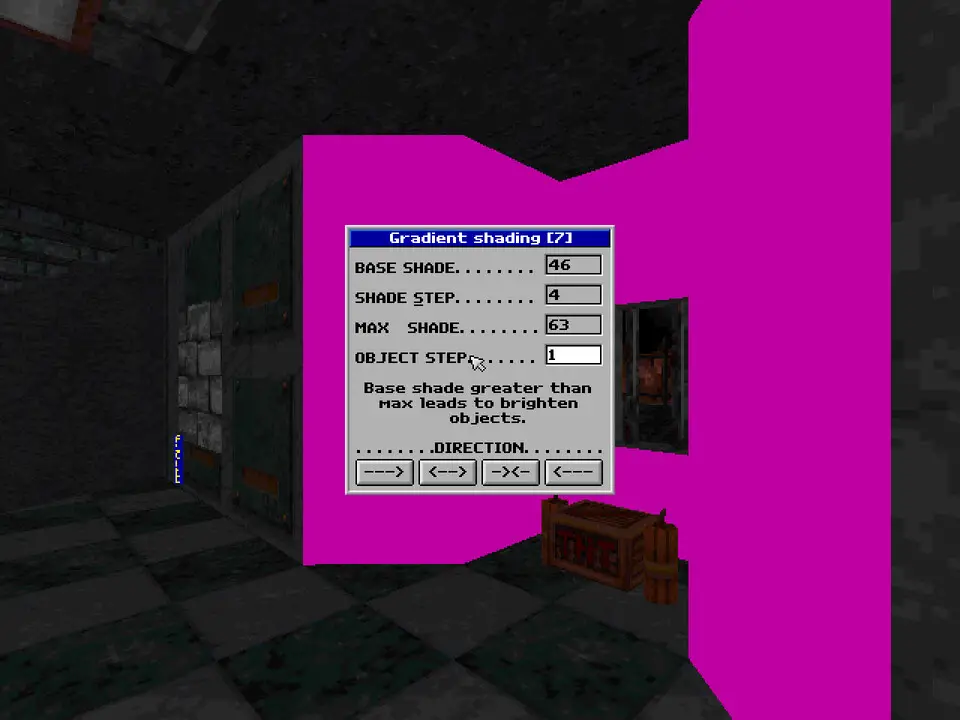
In 3D mode, highlight an wall or sector for gradient shading. Press again on it to unhighlight |
|||
|
Usually, highlighted objects displays as pink colored. However sometimes it might display as normal (for example, after you applied the gradient shading). To show previously highlighted objects, continue holding right mouse button and press
|
|||
|
|
Reset highlight |
||
|
Clicking mouse on a sprite will add or remove it from standard highlight |
|||
|
Source: cruo.bloodgame.ru
|
|||

What is your favorite Extended Mapedit hotkey? Do you have any useful tips for it? Let other users know below.
1089498
489146
406861
351014
297627
270163
24 hours ago
Yesterday
Yesterday Updated!
2 days ago
2 days ago Updated!
2 days ago
Latest articles