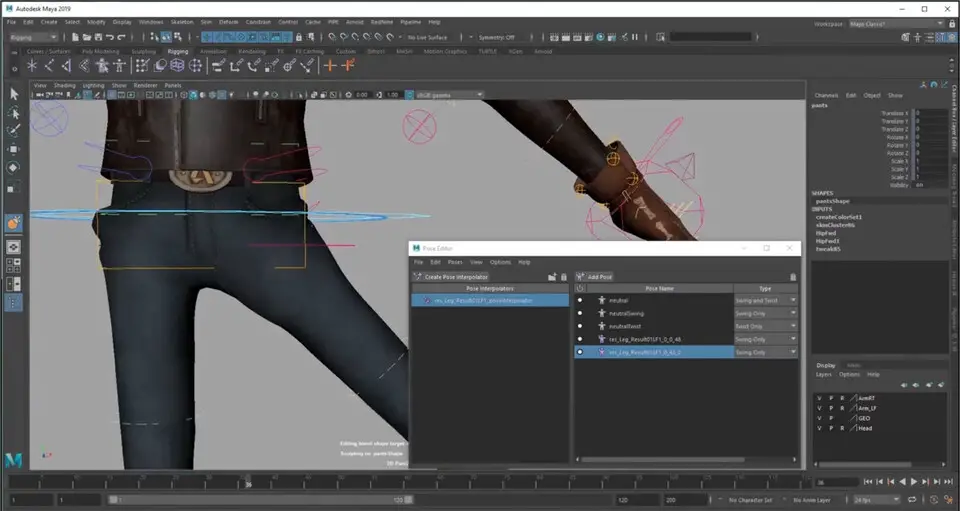
Autodesk Maya 2019 raccourcis clavier

Autodesk Maya 2019  

Zeynel Abidin Öztürk -
3 ans
- Raccourcis
5
\ +

2D Pan tool

3
\ +

2D Zoom tool

0
\

Enable/disable 2D Pan/Zoom

3
I

Insert Keys Tool (for Graph Editor) (press and release)

1
S

Set Key

0
↑   Maj + E

Set key for Rotate

0
↑   Maj + R

Set key for Scale

1
↑   Maj + W

Set key for Translate

2
Alt + J

Toggle Multicolor Feedback

0
↑   Maj + S

With left mouse button for Keyframe marking menu

1
0

Default quality display setting

0
1

Rough quality display setting

1
2

Medium quality display setting

2
3

Smooth quality display setting

1
4

Wireframe

0
5

Shaded display

0
6

Shaded and Textured display

1
7

Use All Lights

0
Ctrl + H

Hide > Hide Selection

0
Alt + H

Hide > Hide Unselected Objects

0
↑   Maj + L

Isolate Select > View Selected (in the panel menus)

0
Ctrl + ↑   Maj + H

Show > Show Last Hidden

0
↑   Maj + H

Show > Show Selection

3
Ctrl + C

Copy

1
ou ⌘ Cmd + C
1
Ctrl + X

Cut

0
ou ⌘ Cmd + X
0
Ctrl + D

Duplicate

0
Ctrl + ↑   Maj + D

Duplicate Special

1
↑   Maj + D

Duplicate with Transform

0
Ctrl + G

Group

0
P

Parent

0
Ctrl + V

Paste

0
ou ⌘ Cmd + V
0
↑   Maj + Z

Redo

0
G

Repeat

0
↑   Maj + G

Repeat command at mouse position

0
Z

Undo

0
ou Ctrl + Z
-1
↑   Maj + P

Unparent

0
Ctrl + R

Create file reference

0
Ctrl + Q

Exit

0
Ctrl + N

New Scene

0
Ctrl + O

Open Scene

0
Ctrl + S

Save Scene

0
Ctrl + ↑   Maj + S

Save Scene As

0
Espace

(When pressed down) Show the hotbox

2
2 Cage + smooth

polygon mesh display

0
Ctrl + F10

Convert polygon selection to Edges

0
Ctrl + F9

Convert polygon selection to Vertices

0
Ctrl + F11

Covert polygon selection to Faces

0
Ctrl + F12

Covert polygon selection to UVs

0
Pg Suiv

Decreases Division Levels for Smooth Mesh Preview or Subdiv Proxy

0
1

Default polygon mesh display (no smoothing)

-2
~

Displays both the original (proxy) and the smoothed mesh

0
Pg Préc

Increases Division Levels for Smooth Mesh Preview or Subdiv Proxy

0
L

Lock/unlock length of curve (press and hold)

0
3

Smooth polygon mesh display

0
Alt +

Move down one pixel

0
Alt +

Move left one pixel

0
Alt +

Move right one pixel

0
Alt +

Move up one pixel

0
Ctrl + B

Edit Paint Effects template brush settings

0
Alt + F

Flood with the current value

0
↑   Maj + B

Modify lower brush radius (press and release)

0
M

Modify maximum displacement (Sculpt Surfaces and Sculpt Polygons Tool)

0
N

Modify paint value

0
B

Modify upper brush radius (press and release)

0
O +

Poly Brush Tool marking menu

0
O +

Poly UV Tool marking menu

0
/

Switch to pick color mode (press and release)

0
Alt + R

Toggle Reflection on or off

0
Alt + C

Turn Color Feedback on or off

0
Alt + A

Turn Show Wireframe on or off

0
U

With left mouse button for Artisan Paint Operation marking menu

Note: Based on selection, the arrow keys let you walk up the hierarchy (object selected) or walk about the object’s components (component selected, including vertices, edge loops, edge rings).
0

Walk down current

0

Walk left in current

0

Walk right in current

0

Walk up current

0
Alt + ↑   Maj + V

Go to Min Frame

0
.

Go to Next key

0
,

Go to Previous key

0
Alt + ,

Move backward one frame in time

0
Alt + .

Move forward one frame in time

0
Alt + V

Turn Playback on or off

0
K +

Virtual Time Slider mode (press and hold and scrub timeline)

0
Ctrl +

Render view next image

0
Ctrl +

Render view previous image

0
F2

Show Animation menu set

0
F5

Show Dynamics menu set

0
F4

Show Modeling menu set

0
F3

Show Polygons menu set

0
F6

Show Rendering menu set

0
Ctrl + M

Show/hide main menu bar

0
↑   Maj + M

Show/hide panel menu bar

0
Ctrl + ↑   Maj + M

Show/hide panel toolbar

0
F10

Edge

0
F11

Face

0
>

Grow polygon selection region

0
F8

Object/Component (Switch between object and component editing)

0
Ctrl + I

Select next intermediate object

0
<

Shrink polygon selection region

0
F12

UV

0
F9

Vertex

0
Alt + F9

Vertex Face

0
↑   Maj + J

Move, Rotate, Scale Tool relative snapping (press and release)

0
J

Move, Rotate, Scale Tool snapping (press and release)

0
C

Snap to curves (press and release)

0
X

Snap to grids (press and release)

1
V

Snap to points (press and release)

0
⤶ Entrée

Complete current tool

0
-

Decrease manipulator size

0
Inser

Enter tool Edit mode

0
+

Increase manipulator size

0
ou =
0
W

Move Tool, or with left mouse button for Move Tool marking menu

0
J

Move, Rotate, Scale Tool snapping (press and release)

0
E

Rotate Tool, or with left mouse button for Rotate Tool marking menu

0
R

Scale Tool, or with left mouse button for Scale Tool marking menu

0
↑   Maj + Q

Select Tool, or with left mouse button for Component marking menu

0
Alt + Q

Select Tool, or with left mouse button for Polygon marking menu

0
Q

Select Tool, or with left mouse button for Selection Mask marking menu

0
Y

Selects the last used tool that is not one of Select, Move, Rotate, or Scale

1
T

Show manipulator tool

0
Ctrl + T

Show universal manipulator tool

0
Inser

Switches between move pivot and move object (Move Tool)

0
D

With left mouse button move pivot (Move Tool)

0
Alt +

Dolly Tool (press and release)

1
Alt +

Track Tool (press and release)

0
Alt +

Tumble Tool (press and release)

0
Espace

(When tapped) Switch between the active window in multi-pane display and single pane display

1
Alt + Ctrl +

Fast pan in the Outliner

0
A

Frame All in active panel, or with left mouse button for History Operations marking menu

0
↑   Maj + A

Frame All in all views

1
F

Frame Selected in active panel

0
↑   Maj + F

Frame Selected in all views

0
F1

Maya Help

0
Alt +

Pan in the Attribute Editor

0
Alt +

Pan in the Outliner

0
]

Redo view change

0
Alt + B

Switch between a gradient, black, dark gray, or light gray background color

0
Ctrl + Espace

Switch between the standard view and full-screen view of the current panels

0
Ctrl + A

Switches between Attribute Editor or Channel Box–displays the Attribute Editor if neither is shown

0
[

Undo view change

0
↑   Maj + }

View next layout

0
↑   Maj + {

View previous layout

The following commands change based on specific editor pane you are actively using.
0
1

Absolute View

0
A

Frame All

0
T

Frame Center View

0
G

Frame Playback Range

0
F

Frame Selected

0
H

Lock Channel

0
3

Normalized View

0
2

Stacked View

0
D

Tangents Auto

0
M

Toggle Curve Selection

0
J

Unlock Channel

0
Alt + T

Decrease Depth

0
Alt + G

Increase Depth

0
>

Graph Downstream

0
Ctrl + .

Graph Remove Downstream

0
Ctrl + L

Graph Remove Selected

0
Ctrl + /

Graph Remove Unselected

0
Ctrl + ,

Graph Remove Upstream

0
?

Graph Up Downstream

0
<

Graph Upstream

0
1

Hypdershade Hide Attributes

0

Arrow  Pick Walk Down

0

Arrow  Pick Walk Left

0

Arrow Pick Walk Right

0

Arrow  Pick Walk Up

0
P

Pin Selected

0
#

Remove Material Soloing

0
/

Select Connected

0
.

Select Down Stream

0
,

Select Up Stream

0
3

Show All Attrs

0
2

Show Connected Attrs

0
4

Show Custom Attrs

0
!

Solo Last Output

0
@

Solo Material

1
5

Toggle Node Title Mode

0
=

Toggle Zoom In

0
-

Toggle Zoom Out

0

Back to Parent

0
⤶ Entrée

Dive Into Compound

0
>

Graph Downstream

0
Ctrl + .

Graph Remove Downstream

0
Ctrl + L

Graph Remove Selected

0
Ctrl + ,

Graph Remove Upsream

0
?

Graph Up Downstream

0
<

Graph Upstream

0
X

Grid Toggle Snap

0
1

Hide Attributes

0

Pick Walk Down

0

Pick Walk Left

0

Pick Walk Right

0

Pick Walk Up

0
Ctrl + /

Remove Unselected

0
/

Select Connected

0
.

Select Down Stream

0
3

Show All Attrs

0
2

Show Connected Attrs

0
4

Show Custom Attrs

0
S

Toggle Attr Filter

0
P

Toggle Node Selected Pins

0
V

Toggle Node Swatch Size

0
5

Toggle Node Title Mode

0
C

Toggle Synced Selection

0
=

Toggle Zoom In

0
+

Toggle Zoom Out

0
,

Up Stream

0
⤶ Entrée

Rename Selected Item

0
F

Reveal Selected

0
Ctrl + G

Pose Interpolator New Group

0
1

Category View

0
2

CPU View

0
3

Thread View

0
Ctrl + R

Toggle Recording

0
Ctrl + D

Duplicate Target

0
Ctrl + G

New Group

0
Alt + D

Select None

0
L

Additive Layer

0
Y

Clip Hold Toggle

0
T

Clip Loop Toggle

0
W

Clip Razor

0
↑   Maj + H

Clip Scale End

0
↑   Maj + G

Clip Scale Start

0
R

Clip Scale Toggle

0
H

Clip Trim End

0
G

Clip Trim Start

0
E

Clip Trim Toggle

0
↑   Maj + I

Create Audio Clip

0
O

Create Clip

0
Ctrl + G

Create Group From Selection

0
↑   Maj + L

Create Override Layer

1
P

Create Pose Clip

0
Ctrl + X

Cut Clips

0
Ctrl + ↑   Maj + G

Explode Group

0
Ctrl + E

Export Selection

0
A

Frame All

1
F

Frame Selected

0
B

Ghost Track Toggle

0
I

Import Animation

0
U

Ripple Edit Toggle Press

0
U

Ripple Edit Toggle Release

0
Q

Scene Authoring Toggle

0
S

Set Key

0
D

Set Zero Key

0
M

Toggle Mute Selected Tracks

0
X

Toggle Snap to Clip Press

0
X

Toggle Snap to Clip Release

0
N

Toggle Solo Selected Tracks

0
K

Toggle Time Cursor Press

0
K

Toggle Time Cursor Release

Source: Autodesk

Partager cette page sur:
Cette page est-elle utile ?
0 0

Informations sur le programme

Nom du programme: Autodesk Maya 2019 Autodesk Maya 2019 (Imagerie)

Page Web: autodesk.com/products/maya/ove...

Comment facile d'appuyer sur les raccourcis: 89%

Plus d'information >>

Nombre de raccourcis: 255

Plateforme détectée: Windows et macOS, mixte

Programmes similaires


Publicité

Abonnez-vous !

Votre email reste confidentiel et nous ñ'envoyons pas de spam.