Autodesk Maya 2019 keyboard shortcuts

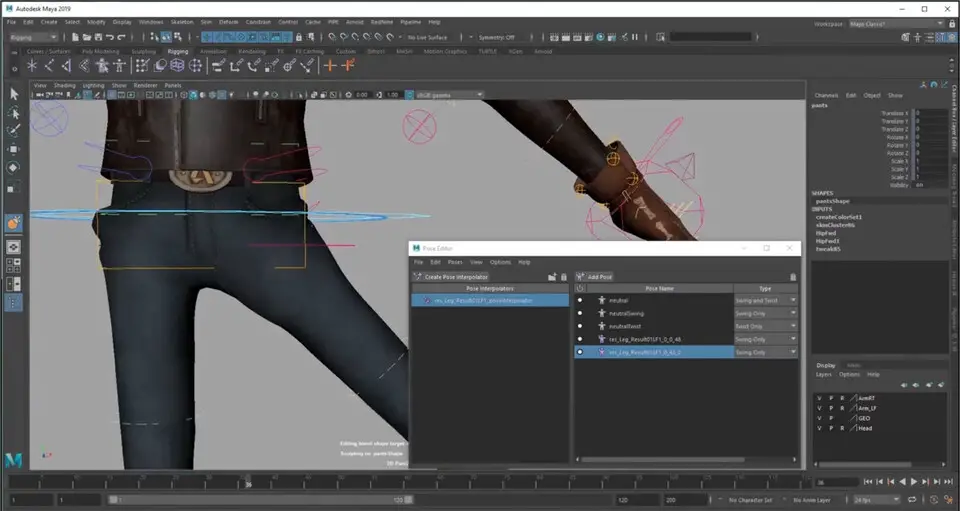
Autodesk Maya 2019  

Zeynel Öztürk -
4 years ago
- Shortcuts
5
\ +

2D Pan tool

3
\ +

2D Zoom tool

0
\

Enable/disable 2D Pan/Zoom

3
I

Insert Keys Tool (for Graph Editor) (press and release)

1
S

Set Key

0
↑   Shift + E

Set key for Rotate

0
↑   Shift + R

Set key for Scale

1
↑   Shift + W

Set key for Translate

2
Alt + J

Toggle Multicolor Feedback

0
↑   Shift + S

With left mouse button for Keyframe marking menu

1
0

Default quality display setting

0
1

Rough quality display setting

1
2

Medium quality display setting

1
3

Smooth quality display setting

1
4

Wireframe

0
5

Shaded display

0
6

Shaded and Textured display

1
7

Use All Lights

0
Ctrl + H

Hide > Hide Selection

0
Alt + H

Hide > Hide Unselected Objects

0
↑   Shift + L

Isolate Select > View Selected (in the panel menus)

0
Ctrl + ↑   Shift + H

Show > Show Last Hidden

0
↑   Shift + H

Show > Show Selection

3
Ctrl + C

Copy

1
or ⌘ Cmd + C
1
Ctrl + X

Cut

0
or ⌘ Cmd + X
0
Ctrl + D

Duplicate

0
Ctrl + ↑   Shift + D

Duplicate Special

1
↑   Shift + D

Duplicate with Transform

0
Ctrl + G

Group

0
P

Parent

0
Ctrl + V

Paste

0
or ⌘ Cmd + V
0
↑   Shift + Z

Redo

0
G

Repeat

0
↑   Shift + G

Repeat command at mouse position

0
Z

Undo

0
or Ctrl + Z
-1
↑   Shift + P

Unparent

0
Ctrl + R

Create file reference

0
Ctrl + Q

Exit

0
Ctrl + N

New Scene

0
Ctrl + O

Open Scene

0
Ctrl + S

Save Scene

0
Ctrl + ↑   Shift + S

Save Scene As

0
Space

(When pressed down) Show the hotbox

2
2 Cage + smooth

polygon mesh display

0
Ctrl + F10

Convert polygon selection to Edges

0
Ctrl + F9

Convert polygon selection to Vertices

0
Ctrl + F11

Covert polygon selection to Faces

0
Ctrl + F12

Covert polygon selection to UVs

0
Page Down

Decreases Division Levels for Smooth Mesh Preview or Subdiv Proxy

0
1

Default polygon mesh display (no smoothing)

-2
~

Displays both the original (proxy) and the smoothed mesh

0
Page Up

Increases Division Levels for Smooth Mesh Preview or Subdiv Proxy

0
L

Lock/unlock length of curve (press and hold)

0
3

Smooth polygon mesh display

0
Alt +

Move down one pixel

0
Alt +

Move left one pixel

0
Alt +

Move right one pixel

0
Alt +

Move up one pixel

0
Ctrl + B

Edit Paint Effects template brush settings

0
Alt + F

Flood with the current value

0
↑   Shift + B

Modify lower brush radius (press and release)

0
M

Modify maximum displacement (Sculpt Surfaces and Sculpt Polygons Tool)

0
N

Modify paint value

0
B

Modify upper brush radius (press and release)

0
O +

Poly Brush Tool marking menu

0
O +

Poly UV Tool marking menu

0
/

Switch to pick color mode (press and release)

0
Alt + R

Toggle Reflection on or off

0
Alt + C

Turn Color Feedback on or off

0
Alt + A

Turn Show Wireframe on or off

0
U

With left mouse button for Artisan Paint Operation marking menu

Note: Based on selection, the arrow keys let you walk up the hierarchy (object selected) or walk about the object’s components (component selected, including vertices, edge loops, edge rings).
0

Walk down current

0

Walk left in current

0

Walk right in current

0

Walk up current

0
Alt + ↑   Shift + V

Go to Min Frame

0
.

Go to Next key

0
,

Go to Previous key

0
Alt + ,

Move backward one frame in time

0
Alt + .

Move forward one frame in time

0
Alt + V

Turn Playback on or off

0
K +

Virtual Time Slider mode (press and hold and scrub timeline)

0
Ctrl +

Render view next image

0
Ctrl +

Render view previous image

0
F2

Show Animation menu set

0
F5

Show Dynamics menu set

0
F4

Show Modeling menu set

0
F3

Show Polygons menu set

0
F6

Show Rendering menu set

0
Ctrl + M

Show/hide main menu bar

0
↑   Shift + M

Show/hide panel menu bar

0
Ctrl + ↑   Shift + M

Show/hide panel toolbar

0
F10

Edge

0
F11

Face

0
>

Grow polygon selection region

0
F8

Object/Component (Switch between object and component editing)

0
Ctrl + I

Select next intermediate object

0
<

Shrink polygon selection region

0
F12

UV

0
F9

Vertex

0
Alt + F9

Vertex Face

0
↑   Shift + J

Move, Rotate, Scale Tool relative snapping (press and release)

0
J

Move, Rotate, Scale Tool snapping (press and release)

0
C

Snap to curves (press and release)

0
X

Snap to grids (press and release)

1
V

Snap to points (press and release)

0
⤶ Enter

Complete current tool

0
-

Decrease manipulator size

0
Insert

Enter tool Edit mode

0
+

Increase manipulator size

0
or =
-1
W

Move Tool, or with left mouse button for Move Tool marking menu

0
J

Move, Rotate, Scale Tool snapping (press and release)

0
E

Rotate Tool, or with left mouse button for Rotate Tool marking menu

0
R

Scale Tool, or with left mouse button for Scale Tool marking menu

0
↑   Shift + Q

Select Tool, or with left mouse button for Component marking menu

0
Alt + Q

Select Tool, or with left mouse button for Polygon marking menu

0
Q

Select Tool, or with left mouse button for Selection Mask marking menu

0
Y

Selects the last used tool that is not one of Select, Move, Rotate, or Scale

1
T

Show manipulator tool

0
Ctrl + T

Show universal manipulator tool

0
Insert

Switches between move pivot and move object (Move Tool)

0
D

With left mouse button move pivot (Move Tool)

0
Alt +

Dolly Tool (press and release)

1
Alt +

Track Tool (press and release)

0
Alt +

Tumble Tool (press and release)

0
Space

(When tapped) Switch between the active window in multi-pane display and single pane display

1
Alt + Ctrl +

Fast pan in the Outliner

0
A

Frame All in active panel, or with left mouse button for History Operations marking menu

0
↑   Shift + A

Frame All in all views

1
F

Frame Selected in active panel

0
↑   Shift + F

Frame Selected in all views

0
F1

Maya Help

0
Alt +

Pan in the Attribute Editor

0
Alt +

Pan in the Outliner

0
]

Redo view change

0
Alt + B

Switch between a gradient, black, dark gray, or light gray background color

0
Ctrl + Space

Switch between the standard view and full-screen view of the current panels

0
Ctrl + A

Switches between Attribute Editor or Channel Box–displays the Attribute Editor if neither is shown

0
[

Undo view change

0
↑   Shift + }

View next layout

0
↑   Shift + {

View previous layout

The following commands change based on specific editor pane you are actively using.
0
1

Absolute View

0
A

Frame All

0
T

Frame Center View

0
G

Frame Playback Range

0
F

Frame Selected

0
H

Lock Channel

0
3

Normalized View

0
2

Stacked View

0
D

Tangents Auto

0
M

Toggle Curve Selection

0
J

Unlock Channel

0
Alt + T

Decrease Depth

0
Alt + G

Increase Depth

0
>

Graph Downstream

0
Ctrl + .

Graph Remove Downstream

0
Ctrl + L

Graph Remove Selected

0
Ctrl + /

Graph Remove Unselected

0
Ctrl + ,

Graph Remove Upstream

0
?

Graph Up Downstream

0
<

Graph Upstream

0
1

Hypdershade Hide Attributes

0

Arrow  Pick Walk Down

0

Arrow  Pick Walk Left

0

Arrow Pick Walk Right

0

Arrow  Pick Walk Up

0
P

Pin Selected

0
#

Remove Material Soloing

0
/

Select Connected

0
.

Select Down Stream

0
,

Select Up Stream

0
3

Show All Attrs

0
2

Show Connected Attrs

0
4

Show Custom Attrs

0
!

Solo Last Output

0
@

Solo Material

1
5

Toggle Node Title Mode

0
=

Toggle Zoom In

0
-

Toggle Zoom Out

0

Back to Parent

0
⤶ Enter

Dive Into Compound

0
>

Graph Downstream

0
Ctrl + .

Graph Remove Downstream

0
Ctrl + L

Graph Remove Selected

0
Ctrl + ,

Graph Remove Upsream

0
?

Graph Up Downstream

0
<

Graph Upstream

0
X

Grid Toggle Snap

0
1

Hide Attributes

0

Pick Walk Down

0

Pick Walk Left

0

Pick Walk Right

0

Pick Walk Up

0
Ctrl + /

Remove Unselected

0
/

Select Connected

0
.

Select Down Stream

0
3

Show All Attrs

0
2

Show Connected Attrs

0
4

Show Custom Attrs

0
S

Toggle Attr Filter

0
P

Toggle Node Selected Pins

0
V

Toggle Node Swatch Size

0
5

Toggle Node Title Mode

0
C

Toggle Synced Selection

0
=

Toggle Zoom In

0
+

Toggle Zoom Out

0
,

Up Stream

0
⤶ Enter

Rename Selected Item

0
F

Reveal Selected

0
Ctrl + G

Pose Interpolator New Group

0
1

Category View

0
2

CPU View

0
3

Thread View

0
Ctrl + R

Toggle Recording

0
Ctrl + D

Duplicate Target

0
Ctrl + G

New Group

0
Alt + D

Select None

0
L

Additive Layer

0
Y

Clip Hold Toggle

0
T

Clip Loop Toggle

0
W

Clip Razor

0
↑   Shift + H

Clip Scale End

0
↑   Shift + G

Clip Scale Start

0
R

Clip Scale Toggle

0
H

Clip Trim End

0
G

Clip Trim Start

0
E

Clip Trim Toggle

0
↑   Shift + I

Create Audio Clip

0
O

Create Clip

0
Ctrl + G

Create Group From Selection

0
↑   Shift + L

Create Override Layer

1
P

Create Pose Clip

0
Ctrl + X

Cut Clips

0
Ctrl + ↑   Shift + G

Explode Group

0
Ctrl + E

Export Selection

0
A

Frame All

1
F

Frame Selected

0
B

Ghost Track Toggle

0
I

Import Animation

0
U

Ripple Edit Toggle Press

0
U

Ripple Edit Toggle Release

0
Q

Scene Authoring Toggle

0
S

Set Key

0
D

Set Zero Key

0
M

Toggle Mute Selected Tracks

0
X

Toggle Snap to Clip Press

0
X

Toggle Snap to Clip Release

0
N

Toggle Solo Selected Tracks

0
K

Toggle Time Cursor Press

0
K

Toggle Time Cursor Release

Source: Autodesk

Share this page on:
Is this page helpful?
0 0

Program information

Program name: Autodesk Maya 2019 Autodesk Maya 2019 (Imaging)

Autodesk Maya is a 3D graphics software for creating cinematic animatons for animated films, visual effects, television programs and video games. Compared to 3DS Max, Maya is a better animation tool whereas 3DS Max is better suited for modeling and texturing 3D models.

Web page: autodesk.com/products/maya/ove...

How easy to press shortcuts: 89%

More information >>

Shortcut count: 255

Platform detected: Windows and macOS mixed

Similar programs


advertisementHeading

Join our mailing list!

Your email is kept private and we don't spam.

What is your favorite Autodesk Maya 2019 hotkey? Do you have any useful tips for it? Let other users know below.