|
|
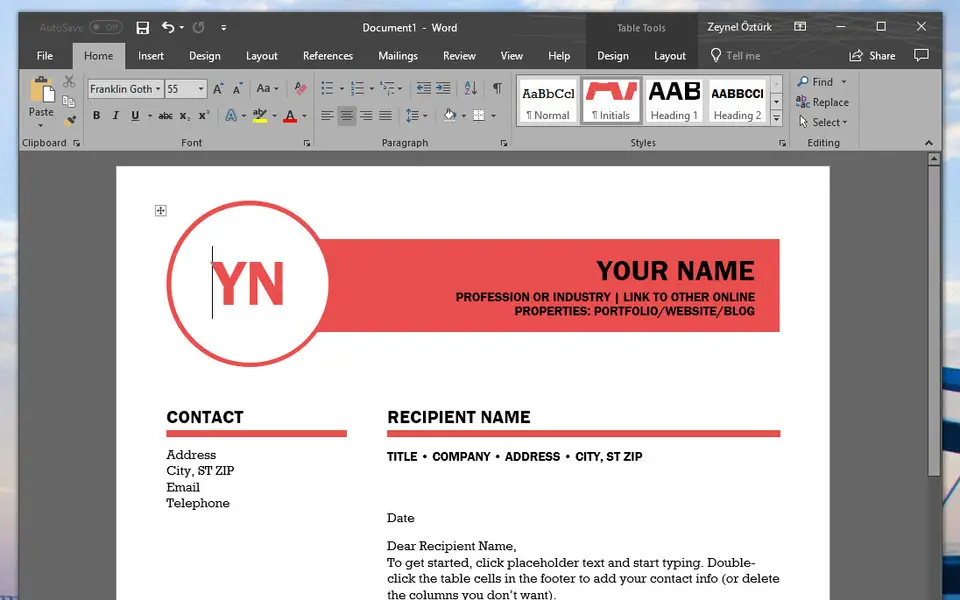
To use Backstage view, open the File page |
||
|
|
To use themes, colors, and effects, such as page borders, open the Design tab |
||
|
|
To use common formatting commands, paragraph styles, or to use the Find tool, open Home tab |
||
|
|
To manage Mail Merge tasks, or to work with envelopes and labels, open Mailings tab |
||
|
|
To insert tables, pictures and shapes, headers, or text boxes, open Insert tab |
||
|
|
To work with page margins, page orientation, indentation, and spacing, open Layout tab. |
||
|
|
To type a search term for Help content, open "Tell me" box on ribbon |
||
|
|
To use Spell Check, set proofing languages, or to track and review changes to your document, open the Review tab |
||
|
|
To add a table of contents, footnotes, or a table of citations, open the References tab |
||
|
|
To choose a document view or mode, such as Read Mode or Outline view, open the View tab You can also set Zoom magnification and manage multiple windows of documents |
Advertisement
|
|
Select the active tab of the ribbon and activate the access keys |
||
|
or
|
|||
|
|
Move the focus to commands on the ribbon |
||
|
or
|
|||
|
|
Move the focus to each command on the ribbon, forward or backward, respectively |
||
|
or
|
|||
|
|
Move down, up, left, or right among the items on the ribbon |
||
|
|
Expand or collapse the ribbon. |
||
|
|
Display the shortcut menu for a selected item. |
||
|
|
Move the focus to a different pane of the window, such as the Format Picture pane, the Grammar pane, or the Selection pane |
||
|
|
Activate a selected command or control on the ribbon |
||
|
or
|
|||
|
|
Open a selected menu or gallery on the ribbon |
||
|
or
|
|||
|
|
Finish modifying a value in a control on the ribbon, and move focus back to the document |
||
|
|
Cycle through floating shapes, such as text boxes or images (press Tab repeatedly) |
||
|
|
Exit the floating shape navigation and return to the normal navigation. |
|
|
Create a new document |
||
|
|
Open a document |
||
|
|
Close a document |
||
|
|
Split the document window |
||
|
|
Remove the document window split |
||
|
or
|
|||
|
|
Save a document |
|
|
Print a document |
||
|
|
Switch to print preview |
||
|
|
Move around the preview page when zoomed in |
||
|
|
Move by one preview page when zoomed out |
||
|
or
|
|||
|
|
Move to the first preview page when zoomed out |
||
|
|
Move to the last preview page when zoomed out |
|
|
Insert a comment (in the Revision task pane) |
||
|
|
Turn change tracking on or off |
||
|
|
Close the Reviewing Pane if it is open. |
||
|
|
Select Review tab on ribbon |
||
|
|
Select Spelling & Grammar |
|
|
Open the search box in the Navigation task pane |
||
|
|
Replace text, specific formatting, and special item. |
||
|
|
Go to a page, bookmark, footnote, table, comment, graphic, or other location |
||
Advertisement |
|||
|
|
Switch between the last four places that you have edited |
||
|
|
One character to the left |
||
|
|
One character to the right |
||
|
|
One word to the left |
||
|
|
One word to the right |
||
|
|
One paragraph up |
||
|
|
One paragraph down |
||
|
|
One cell to the left (in a table) |
||
|
|
One cell to the right (in a table) |
||
|
|
Up one line |
||
|
|
Down one line |
||
|
|
To the end of a line |
||
|
|
To the beginning of a line |
||
|
|
To the top of the window |
||
|
|
To the end of the window |
||
|
|
Up one screen (scrolling) |
||
|
|
Down one screen (scrolling) |
||
|
|
To the top of the next page |
||
|
|
To the top of the previous page |
||
|
|
To the end of a document |
||
|
|
To the beginning of a document |
||
|
|
To a previous revision |
||
|
|
After opening a document, to the location you were working in when the document was last closed |
|
|
Mark a table of contents entry |
||
|
|
Mark a table of authorities entry (citation). |
||
|
|
Mark an index entry |
||
|
|
Insert a footnote |
||
|
|
Insert an endnote |
||
|
|
Go to next footnote (in Word 2016) |
||
|
|
Go to previous footnote (in Word 2016) |
||
|
|
Go to "Tell me what you want to do" and Smart Lookup (in Word 2016) |
|
|
Switch to Read Mode view |
||
|
|
Switch to Print Layout view |
||
|
|
Switch to Outline view |
||
|
|
Switch to Draft view |
|
These shortcuts only apply if a document is in Outline view.
|
|||
|
|
Promote a paragraph |
||
|
|
Demote a paragraph. |
||
|
|
Demote to body text |
||
|
|
Move selected paragraphs up |
||
|
|
Move selected paragraphs down |
||
|
|
Expand text under a heading |
||
|
|
Collapse text under a heading |
||
|
|
Expand or collapse all text or headings |
||
|
|
Hide or display character formatting |
||
|
|
Show the first line of text or all text |
||
|
|
Show all headings with the Heading 1 style |
||
|
|
Show all headings up to Heading 1-9. |
||
|
|
Insert a tab character |
||
|
|
Turn extend mode on |
||
|
|
Select the nearest character |
||
|
|
(press once to select a word, twice to select a sentence, and so on) Increase the size of a selection |
||
|
|
Reduce the size of a selection |
||
|
|
Turn extend mode off |
||
|
|
Extend a selection one character to the right |
||
|
|
Extend a selection one character to the left |
||
|
|
Extend a selection to the end of a word |
||
|
|
Extend a selection to the beginning of a word |
||
|
|
Extend a selection to the end of a line |
||
|
|
Extend a selection to the beginning of a line |
||
|
|
Extend a selection one line down |
||
|
|
Extend a selection one line up |
||
|
|
Extend a selection to the end of a paragraph |
||
|
|
Extend a selection to the beginning of a paragraph |
||
|
|
Extend a selection one screen down |
||
|
|
Extend a selection one screen up |
||
|
|
Extend a selection to the beginning of a document |
||
|
|
Extend a selection to the end of a document |
||
|
|
Extend a selection to the end of a window |
||
|
|
Extend a selection to include the entire document |
||
|
|
Select a vertical block of text |
||
|
|
Extend a selection to a specific location in a document |
|
|
Delete one character to the left |
||
|
|
Delete one word to the left |
||
|
|
Delete one character to the right |
||
|
|
Delete one word to the right |
||
|
|
Cut selected text to the Office Clipboard |
||
|
|
Undo the last action |
||
|
|
Cut to the Spike (Spike is a feature that allows you to collect groups of text from different locations and paste them in another location) |


What is your favorite Microsoft Word 2019 hotkey? Do you have any useful tips for it? Let other users know below.
2. Computer Battery drains very fast, full charging takes hours .. why ? how to prevent this
3. Starting the laptop takes enormous time I have Quick Heal Software.
1. Press Ctrl + V to paste formatted text.
2. Press Ctrl (and release) to open paste context menu.
3. Press T to select "Keep text only".
- Click "Customize" button next to the "Keyboard shortcuts" label.
- On Categories (left) column, click "All Commands"
- On Commands (right), find "PasteTextOnly" and assign a new shortcut (by clicking empty "Press new shortcut" area and pressing the shortcut.
This worked for me.
1110107 169
499624 8
411963 373
368513 6
308601 6
279017 38
7 hours ago
9 hours ago
Yesterday Updated!
Yesterday Updated!
Yesterday Updated!
Yesterday
Latest articles
Why I use Volume2, and why you would too
<div> has meaning to browsers
How to Turn Write Protection On or Off for a USB Flash Drive
What is a modifier key?
Sync time on Windows startup